Tuesday, 12 November 2013

Photoshop - Partial black and white

This is the original photo.
I went on to photoshop to bring out the guy in the checked shirt so I want to keep him in colour but have the rest in black and white so I went on to Photoshop CS6.


I duplicated the layer and then hide the layer I had just made and clicked my original layer.

I then went to image - adjustments - black and white then clicked ok and it comes up with a separate box and I changed the 'Red's' percentage to 6% and clicked okay.

I then made the second layer visible again.

I then clicked the eraser tool
then started erasing the parts I didn't want in colour!

 This is what I ended up with for the final product.

Monday, 11 November 2013

Early Morning Edit on Photoshop

Firstly I started by choosing a landscape photo and opened it in Photoshop CS6.


I then went to layer - new adjustment layer - levels, then clicked okay and went to the middle box and changed it to - 0.53. Then changed the output levels to 0 and 223.


Then went to layer - new adjustment layer - photo filter and clicked ok.
Then I changed the filter to - Warming Filter (LBA)
Density - 85%
And make sure Preserve Luminosity box is clicked.


Then went to layer - new adjustment layer - brightness/contrast and clicked ok.
Brightness - 20
Contrast - 60


Then I made a new blank layer and choose my paintbrush , made sure I chose a soft brush and messed around with the opacity but kept the flow at 75%. At the end my opacity at 10% to get a nice morning fog. I then dragged my paintbrush across the horizon of the picture and went over the grass to give it the fog look. 

Here is the final product.

Thursday, 7 November 2013

Fashion Photography Proposal


Beth Wilson
Unit 57 Photography and Photographic Practise

Working Title- Fashion

Purpose- Fashion

Deadline- 15th November 2013

Audience- My intended audience is 16+ boys because the clothes and look of the model I will be going for is for the young generation but can relate to people in there mid-20’s.

Concept- The concept for my fashion shoot is to get some girl models to model some clothes for the autumn/winter months, so wearing furry hats, big scarfs and warm clothing.

Location- I want to shoot some pictures in some woods because it will have the autumn/winter look because you can see the models breath and the trees are turning orange/red so it will go with the clothing being worn. Also I want to do some photos with the white-screen so I can have extra lighting and a plain background to work with.

Quantity- I want the size of the pictures to be A5 but some smaller ones like A6/A7. All together about 5/6 photographs to be taken all together.

Usage rights- I will use these pictures for my own portfolio for University and job applications. I will also be using them for a college exhibition in November 2013.

Fees- For my photo-shoot I will be hiring a Canon EOS 650D for a weekend which will cost £50 with £10 VAT so all together it will cost me £60.

Observation


Buildings


Activity 8 - Focus


Activity 5 - ISO & Activity 6 - Aperture

ISO- 1/640
Aperture- F6.3

ISO- 1/800
Aperture- F7.1

ISO- 1/1000
Aperture- F8.0

ISO- 1/1250
Aperture- F9.0

ISO- 1/1600
Aperture- F10

The Triangle of Exposure


Iso- the measure of a digital camera sensor's sensitivity to light.

Aperture- the size of the opening in the lens when a picture is taken.

Shutter Speed- the amount of time that the shutter is open.

With the intersection of these three elements that an image's exposure is worked out.

A change in one of the elements will impact the others. This means that you can never really isolate just one of the elements alone but always need to have the others in the back of your mind.

Activity 4 - Lines


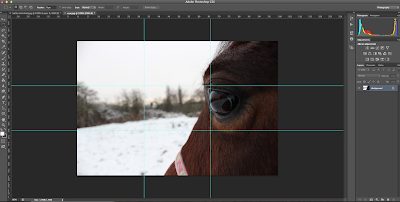
Activity 2 - Rule Of Thirds

 Before the rule of thirds grid was added.

After the rule of thirds grid was added.

 Before

After

Before 

After